Go to Settings >> Configuration from the navigation bar and click STIX/TAXII.
General Information consists of all the details about the fetched Cyber Threat Intelligence (CTI) data. You can find the total number of data fetched in Total Records and the status of fetched data in Status. You can also find the most recent attempt made to fetch data in Last Fetch Attempt and the last date and time when data was successfully fetched in Last Fetch Date.
Go to Settings >> Configuration from the navigation bar and click STIX/TAXII.
Click General Information.

General Information
For StixTaxii to fetch data, an initial setup where details like server endpoints, authentication credentials and data filtering options must be configured. You can perform this setup from Settings.
Go to Settings >> Configuration from the navigation bar and click STIX/TAXII.
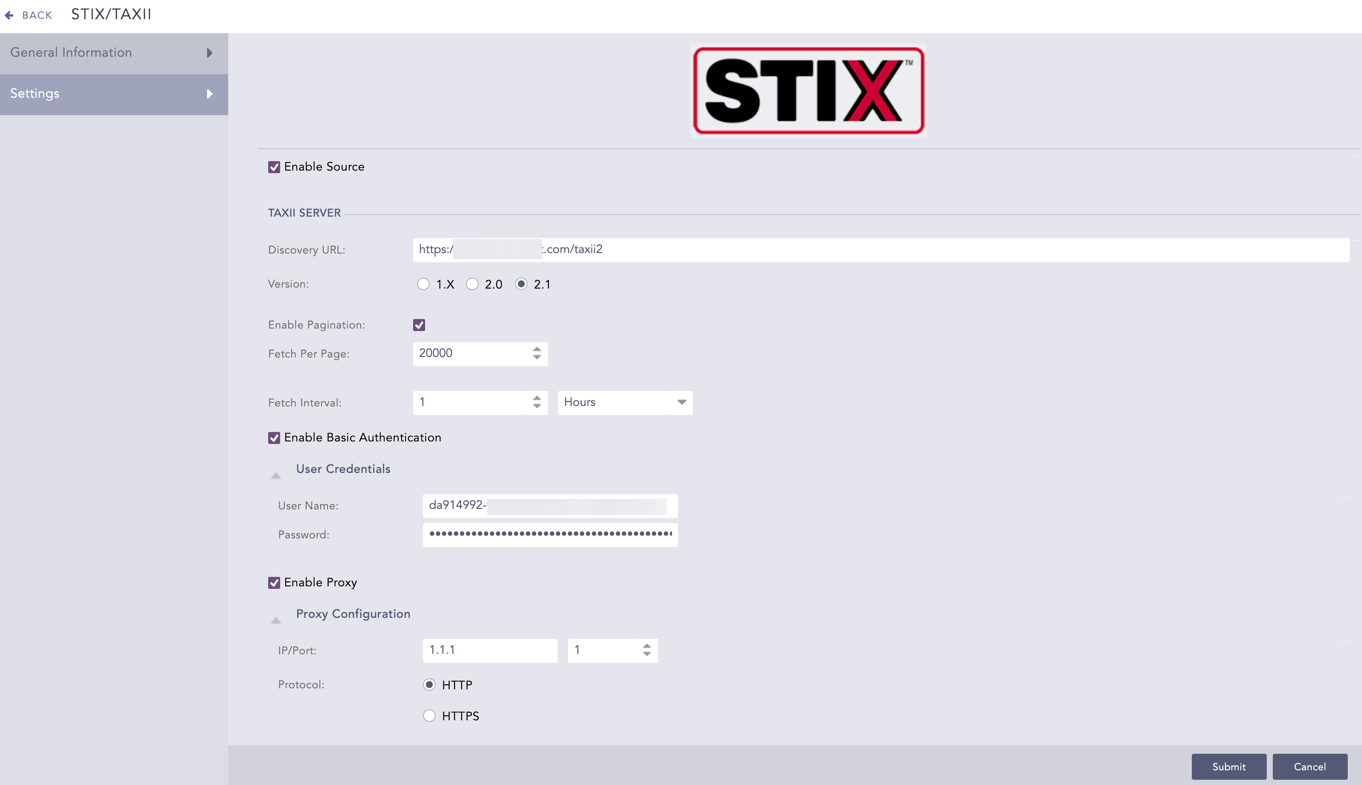
Click Settings.
Select Enable Source to activate StixTaxii.
Enter the Discovery URL, which is the location of the discovery service in the TAXII server.
Select a STIX Version.
5.1. If you select 1.X, you must also select the Fetch From date. StixTaxii fetches data from the specified date.
5.2. If you select 2.0 and 2.1, you can Enable Pagination to separate data fetching into pages.
5.2.1. Select the number of data to be retrieved in a page in Fetch Per Page.
Select Fetch Interval in either hours or days.
Select Enable Basic Authentication if the TAXII server uses basic authentication.
In User Credentials, enter TAXII server User Name and Password.
Select Enable SSL Authentication if the TAXII server uses SSL authentication.
In SSL Configuration:
10.1. Upload the SSL certificate file in the Certification File.
10.2. Upload the SSL key file in the Certificate Key.
10.3. If you configured a password for SSL key decryption, enter it in Key Password. If you didn’t configure a password, leave it empty.
Select Enable Proxy to use a proxy server.
In Proxy Configuration:
12.1. Enter the proxy server IP address and the Port number.
12.2. Select either HTTP or HTTPS protocol.
Click Submit.
Configuring STIX